1/03/2012

Tiger I 1/48 Winter camo "Part 4" LINKS

...
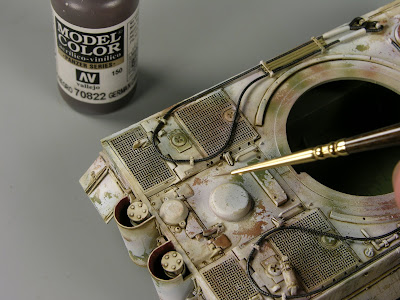
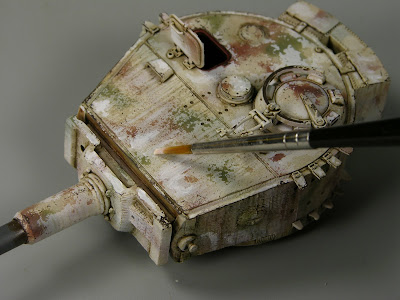
Let's go to paint the spare links today.
Use tape to keep the links in position to be painted with Airbrush. Use a dark brown color, Tamiya or Mr Hobby could be perfect. Then, using the range of Lifecolor to make rust, paint different shades in some links.


As soon as it is dry, apply a coat of Worn Effects to create small chips.

Now apply the white color, Tamiya one mixed with a 40% of Gaianaotes lacquer thinner. Don't apply a heavy coat, just a little soft. With heavy coats is more diffciult to create small chipping.


After you paint it, use water and a flat hard brush to remove part of the white paint. before, you made humidify the surface with a little water, and wait few seconds until the white paint get fragil and ready to work.


Now glue the links to the turret with Super Glue. the rest of the weathering will be done with them in place.


use differnet shades of washes and Streaking grime colors and repeat the same proces like in the rest of the tank, but less intense.


You can repaint some chips if you don't like too much the look. Also, you can add some Streaking Rust and finally some highlight with white oil to refoirce the contrast.


With few steps the look is very realistic. Not needed too much steps and could be more than anought for a scale like 1/48 or 1/35.


Compare the size of the spare links with my fingers....


...and see how effective can be this technique in a close view.


Do you like it? I hope. The next chapter will be the last one for sure. Just mud and dust and final touches. But I thought that this subject deserved a chapter for it self.

Thank you very much one more time for follow this blog.

...


1/01/2012

Tiger I 1/48 Winter camo "Part 3"

...

HAPPY NEW YEAR 2012 to all of you!!

The best way to start a new year is making models, so, here my contribution to this new year. This is the 3th chapter of the whole painting process of a winter Tiger I in 1/48th scale. If you haven't see the other two, please, read first the chapter I and the chapter II.
Now is time for chipping and oil paint effects.


We start using the dark bromw 70922 from vallejo. It's a good color for paint dark metal chips. Use a very fine brush, new one and sharp.


Start doing small dots, and lines...very small, and keep gorwing it as much as you want.


Treat each detail in a different way. Example, more intense chipping in some parts, while others remain more new. That contrast will help to the model to give bigger realism.

The oil paints is always a important step in each weathering. This paint is very flexible, easy to blend and colorfull. The oils can help us to give contrast, deep, shadows, and much more effects to our models. In this case, we will use few basic colors to create a contrast effect in some mudguards and some horizontal areas. Maybe, in anotehr kind of subject we can use more oils, or less. We must adapt this technique to each model and evoirement.


Use the white color to reiforce the white camo. Use a medium round brush for this task.


Apply the color only in one side of the mudguard section.


Just in the next section, apply a grey-brown color.


Clean the brush or take a new one and with a litle White Spirit stump the color.


See the result. The transition is soft, but each color, both , the white and brown, are gradually more intense to the union of both mudguards sections. It create contrast, a subtile and nice visual effect to give volume to our model. You can use this technique not only in the mudguards, but in any other part of your model, like panels, hatches, engine compartiments and much more. Just selct the apropiated color for each subject. In this case I used white because the base color is winter camo.


Another example. This time we use a dirty grey to represent the acumulated dirt over the horizontal surfaces, like around the turret ring.


One more time, paint and stump with a clean brush and a little White Spirit.


Use the white Oil color to make the highlights in the winter camo. After the washes adn streaking effects, the look of our model will be a little dark, not as white as we can expect of a winter tank. Now is time to bring to the life the white camo adding small dots of white color in some areas. Don't over do it and be RANDOM with this process. And of course, stump or blend the color to make it softer and natural.


Ok, another step is already done. Very slowly, our model is getting contrast and tonal variation. This is very important in this kind of vehicles, to avoid the monotonie and boring surfaces. Note how you can see the original camo under the winter camo, faded and damage by the envoirements and elements. The chipping is adapted to the scale. These ones must be small and not excesive. And the new shades that we have give to our model will give volume and a rich surface. Now is time to paint all small details before we made the mud and dust and the final effects.
In the next chapter, I will explain how to give the final touches to the model. We will work with the spare links around the turret, painted also in winter camo. We will add the earth, mud, oils and grease and much more. Keep tunned and thank you very much for read this. I hope you like the progress of this small example of a winter tank. It is really easy and simple if you follow these steps.


...


12/13/2011

Tiger I 1/48 Winter camo "Part 2"

...
Welcome again to the second part of this interesting article about how to paint a Tiger I with a winter wash. In the preview chapter I explained how to use the Worn Effect fluid to make a Camo with chipping. Now we will use it again to make the winter wash.

Apply a nice coat of Worn Effects fluid over your vehicle. remeber that it is water based, it is clean, no bad smell and easy to use, just pour it in your airbrush and apply a coat.


After a couple of minutes, apply your white color. tamita will work very well in this case. Note that I applied a soft and random layer of white color. Not too thick.


Now we can start scratching the surface. Apply a little water over it and start moving your brush over the surface until see that the paint come off. It is very easy.


See how random is it. Some areas can be very damaged and others almost new.


Now is time for the washes. The color AK 066 Wash for Africa vehicles will be a good color also for winter vehicles. It is a bit neutral and was designed for light sand colors.


Apply a drop over the lines, joins, details and rivets. Don't worry if you are not accurate. We will clean the excess later. be sure your base is SATIN, and NOT FLAT. this is very important to avoid the expansion by capilarity.


Now using a clean brush and thinner, we will clean the excess of wash. The wash color must be dry. I usually wait for 3 or 5 minutes after apply the wash.


This process is very easy and simple. if we follow the rules (satin surface, controlled application, let it dry and clean the excess) we will obtain always a good result.


Let's go for a funny step: Winter Streaking grime


This technique is very simple. Just draw fine vertical lines in the vertical or inclinated surfaces. Make some of then shorter than others.


After it is dry for a couple of minutes, use a flat clean brush with a little Thinner and stump the lines with vertical motions. Don't try blend the color at once, but in several attemps.


You must get a look like this:


If you reomve to much, just repeat the proces after few minutes.


In the next chapter we will see how to make the metal chips and we will work with oils too.
Thanks for take your time to read this and I hope you like it.

Don't be shy and post your comments or feedback. I am working on this right now, so....your suggestions can help me to be focus in this or that subject or problem.


...


12/08/2011

Tiger I 1/48 Winter camo

...
Hello friends.

I know that I was too much time in silence but was because a good reason. i was making the new FAQ2. And now that it is ready and printed, I can back again to apint models. I have some different projects in my workbench and one of them is this little Tiger I out of box that I build time ago. Now I ampainting it in winter camo, using the Chipping fluid (the soft one) to make the chipping. I will try to post the whole step by step so stay tunned.


First I painted the dark yellow, just plane without modulation or other effects.


The worn effects fluid was applied inmediatly after the base color and once it is dry I painted the other two color camo with an airbursh.


I used a small plain brush to humidify the surface and scratch the camo colors. The zimmerit texture helped me in this task.


Now I have ready the base for the second step: the winter was , also very damaged. Ahh, right now we must apply a satin varnish coat to protect the preview work.

In the next chapter I will explain the winter wash camo step by step.


Thank you for watching.


...


7/22/2011

WHY NOT??? WHEEL MASKS!

...

Few weeks ago I was thinking about this new product. I have seen it in internet since long time ago, but reciently I was thinking seriusly about it. I always painted the wheels by brush, I means , the rubber. It is always a hard work, specially when you have a panther tank in your hand, or even a PzIV. I am always looking for fast tips and technqiues, and I thought this stuff from QUICK WHEEL, can help me. So...i decided to take some of these masks, and by the way, some of their new resin wheels for some vehicles.

I just wanted to try and I was not sure how is the quality of this stuff. But when I recived it (the service is just superb) I was shock with the quality. This tool is very professional, made in hard plastic and have a special design that help to the modeller to mask the whels easily and all of them at once. The plastic wheels fit perfectly in the holes , and them you can paint with airbrush the center of the wheels with the tank color. previesly you must paint the whole wheel in rubber color!!

In few seconds you paint the rubber of all your wheels....and the result is just PERFECT!!!!!!!

I cannot say anymore except that it must be necessary for me since now. the important thing is that the mask can be used forever in all your future models.
I recomend you this new stuff.

You can get it directly form this site:

QUICK WHEEL


I hope upload a short step by step very soon.

Thank you.


...