Finally the model is finished. After add the mud and other small effects, it is ready in case we want to make a small diorama.Is very important to see the nice effect made by the acumulated earth in the horizontal surface in the upper hull. It help to create contrast and bring down the excesive white brightness.
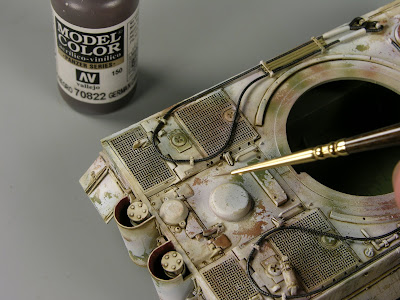
 Ok, let's go to finish the model. Some steps before. use a graphite pencil to make the metal effect in the MG ring. This useful tool can help us to give a metal look to many details. Keep it sharp.

The different tools was painted using Vallejo colors. Paint some shadows and some highlights to create a volume in the tools and accesories. You can add some dust effects with pigments or washes to adapt the tools to the rest of the weathered vehicle.
 The fire extinguiser is really small. But I was able to paint a mini label with a fine brush and vallejo colors. Also I painted it with Dark Yellow, like the old one was remplaced by a new one.
 The general look of the tools is good enought for this scale.
now is time to make the dust, earth and mud. This time, I have return to my old technque of pigments, but this time with the new AK pigments, which is a bit different than my old ones. The colors is also differnet. I was tired of the same shades so, the new ones are more ...neutral, less bright. Here you can find the whole range, limited, which means that it is the whole collection, just the basic stuff to avoid get crazy looking among 1 million colors. Now than the actual techniques is not only based in pigments, could be a good alternative these colors if we want to something ocasional, like in my case right now.
 You can use the Pigment fixer or just White Spirit to fix the pigments. if you are not sure how will be the look, try frist the White Spirit and later the Fixer Glue. Pigments fixed with White Spirit can be removed more or less easily. Apply the different shades of pigments and then, use a brush with Fixer to humidify the surface.
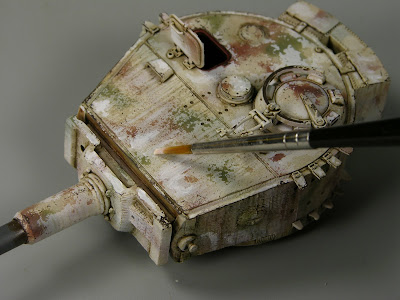
 Try to concentrate the dust around the details and use dar colors for the most hiden areas, around the details or turret, etc...
When it is dry, the look will be like this one. You can repeat the process as much as you want to increase the effect of acumulated earth or dust.
 And now we will amke the mud with the actual method, using the enamel products from AK and plaster. Even if the Fresh Mud color is a bit satin, we can add Wet Effect Fluid to the mix to get a more shiny effect in the mud. Use an old brush to make the mix.
 Low density mix of mud, this means, with more Enamel color and less plaster, will provide us smaller dots of mud when we make of splashed mud. Use an airbrush to project air over the brush loaded of mud mix. It will generate a nice splash over the front hull.
 Use the same mix to apply mud in the tracks.
 And after it is dry, apply the Dark Steel pigment to create the metal effect in the external parts fo the links. If it is not enought shiny, you always can mix this powder with Humbrol 11 (silver) and apply the mix with dry brush over the surface.
 Well, the model is finished. We can add stowage or more details if we want , but I prefer to leave it clean of stuff to allow see the effects over the model.


I hope you have enjoy this big step by step. remeber that you have another 4 chapters explaining the whole process since the begining. if you have any doubt or comment, please, feel free to post here. Thank you very much for watching!
Mig Jimenez
.....